FloMotion with the coding agent of choice
September 5, 2026
Many engineers already have a coding agent open all day: Claude Code, Codex, Gemini CLI, Cursor or something similar. The FloMotion desktop app lets that agent do the work the built-in assistant does, with the same tools, while the result is visible in the app window, at a reduced credit cost because the model is not billed. This guide walks through setting it up and running a first task, a servo circuit with a simulation, from the agent's terminal.
What gets installed
The desktop app is a small open source shell around the FloMotion web client, plus a flomotion command line next to it. The agent runs flomotion commands in its shell. Each command is handed to the window, which does the work with whatever account is signed in there. No API key is created and nothing is configured on the agent side beyond pointing it at one file of instructions.
The window is not optional. Some tools only exist inside the client: screenshots of a CAD workspace, circuit simulation, frames and recordings from a control scene. Those run in the window and come back to the agent as files on disk.
Step 1: install and sign in
Builds are published as archives on the GitHub releases page, one per platform, with an install script that fetches the right one and puts flomotion on the path. The archives are not code signed, so anyone who would rather not run an unsigned binary can build from source with Rust and Node; the repository explains how.
Start the app once and sign in, with the same account as on the website. An anonymous session also works and comes with the usual free credits. From here on the window can stay in the background; the command line starts it when needed and waits for it to be ready.
Step 2: hand the agent its instructions
The agent needs to know three commands. The repository's AGENT.md explains them in a form written for agents, and flomotion skill prints the same text. The quickest way to onboard an agent is the Onboard your agent button on the home page, which copies a one line prompt asking the agent to fetch that file and follow it. Pasting it into the agent is the whole setup.
The three commands, for reference:
flomotion agentprints the current state as JSON: the role, a system prompt to follow, the tools available right now with their input schemas, and a snapshot of the open schematic or workspace.flomotion act <tool> '<json>'runs one tool and prints the result. When the action changed the role, for example by opening a schematic, the reply also carries the new prompt and tool list.flomotion job <id>waits for a longer server job such as a validation run or G-code generation.
The same commands can be typed by hand, which is a good way to see what the agent sees.
Step 3: give it a task
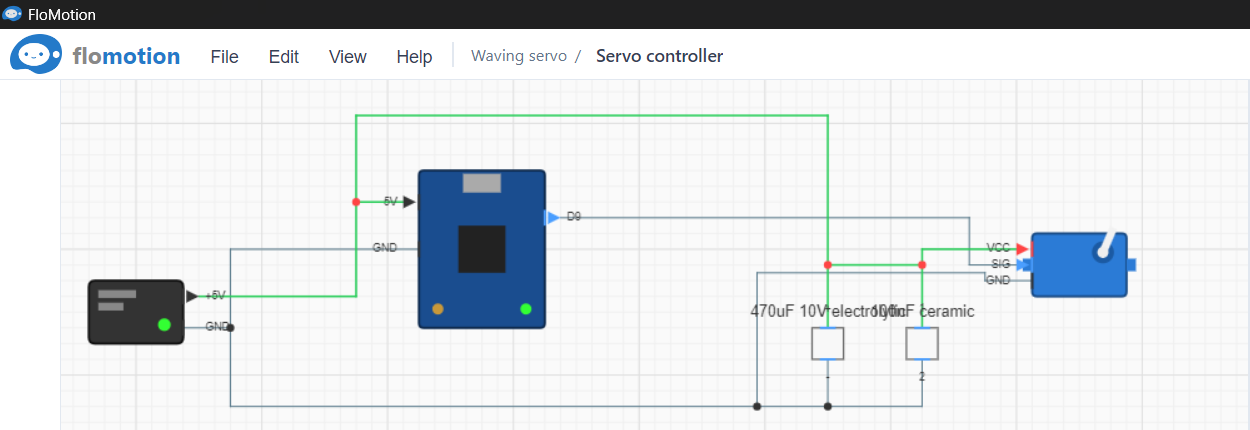
With the instructions loaded, the task is a normal message to the agent. Something like: build a schematic with an Arduino Nano driving a hobby servo from a 5 V supply, then simulate it and confirm the servo moves.
Here is what a capable agent does with that, and what shows up in the window at each step.
It finds out where it is. flomotion agent comes back with the bootstrap role and three tools: list, open and create a project. Nothing is open yet.
It creates a project and a schematic. flomotion act create_project followed by flomotion act create_schematic. The second reply says the role changed to electronics and includes the electronics tools and prompt. The window opens the new schematic at the same moment. If the user clicks somewhere else in the window meanwhile, the agent's next command follows the user, because the window is the source of truth for what is open.
It defines and places the parts. The Nano, the servo and the supply are created with upsert_component, then placed and wired with upsert_design. The design check runs on save and the reply lists warnings, for example a part too close to its neighbour, so the agent can fix spacing before moving on. Parts appear in the window as each save lands, and the view recenters on them.
It attaches behaviour and simulates. The electronics prompt tells the agent how to give the servo and the microcontroller a small behaviour model, the same way the built-in assistant does. flomotion act run_simulation then runs in the window, not on the server, and prints the warnings, event counts and any component failures. get_snapshots and get_timeline read out voltages, currents and the servo position over time. When the agent asks for a screenshot, the image lands in a temp folder and the path is printed, so the agent can look at it like any other file.
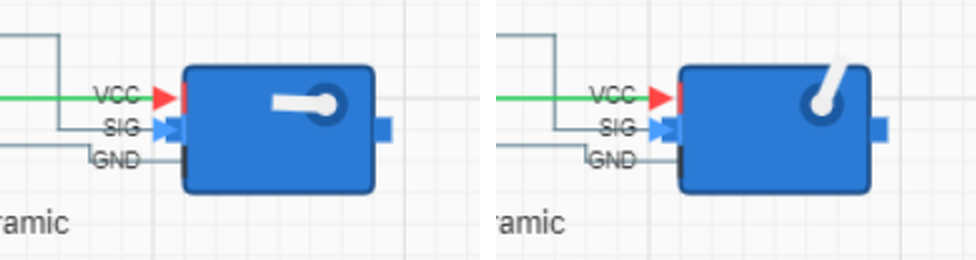
It reads the result. The simulation output lists warnings and failures, and a circuit can pass the design check and still not work. A missing ground reads as 0 V on every rail. A supply declared with a category the engine does not solve is dropped from the circuit. Both are reported in the output, and an agent that reads each result before the next action catches them.
Step 4: take the result out
flomotion export kicad writes the schematic as a KiCad file. For CAD workspaces the same command takes step or stl with a part name, assembly_step for the whole assembly, and gcode for a machined part. flomotion import part.step goes the other way and drops a STEP model into the open workspace, after which the agent can place and joint it like any other part.
The exported files are written where the agent asked for them, or to a temp folder, and the path is printed.
Moving between electronics, CAD and control
Tools depend on where the agent is. Opening a schematic gives the electronics tools, a workspace the CAD tools, a scene the control tools, and closing the item goes back to file management. A task that spans domains is a sequence of open, work, close, open, and the agent handles that with the same act command. The window follows each step.
What it costs
FloMotion does not bill the model, so the credit cost is lower than with the built-in assistant. Each server action the agent runs is one iteration at a flat rate of 0.2 credits. Background jobs where the server does heavy work are billed the same as when started from the chat. Actions that run in the window, such as screenshots and simulation, are free. Current rates are on the credit costs page.
The free daily credits go further as well. Ten free credits cover fifty server actions a day, about five times the usage the built-in assistant gets from the same credits.
Why a command line rather than an MCP server
MCP is the usual way to give an agent tools. An MCP server registers its full tool list with the agent at start. That list, with every schema, is sent to the model with every prompt for the rest of the session. FloMotion has a lot of tools: project and file management, the electronics editor, CAD part authoring, control scenes, simulation, exports, and the skills that add more for specific jobs. The schemas are large. The CAD part definition alone runs to pages. As one MCP server, all of that would be sent on every turn, most of it unrelated to the current step, and the tokens spent on the tool list would exceed the tokens spent on the work.
FloMotion loads tools in two levels instead. A role is chosen by what is open: bootstrap with nothing open, manager inside a project, electronics for a schematic, mechanics for a workspace, control for a scene. Each role has its own prompt and its own handful of tools. Within a role, skills add tools for a specific task, for example simulation or STEP import, and only while that skill is loaded. Opening an item swaps the role, closing it swaps back, loading a skill adds its tools, and nothing else is in the list. The same mechanism keeps the built-in assistant's prompt small.
The command line carries that over unchanged. Each reply tells the agent whether the role or skill changed and, if so, hands over the new prompt and tool list. The agent registers only those with its model and keeps them in its cached conversation until the next change, so a long session pays for the tools it actually uses rather than the whole catalogue on every turn. It also works with any agent that can run a shell command, and the same commands can be typed by hand to see exactly what the agent saw.
Compared with the built-in assistant
Both use the same tools, prompts and skills. The difference is what happens to tools that are no longer needed.
The built-in assistant's prompt is rebuilt by FloMotion on every turn. When the role or skill changes, the old tools are removed completely. When the conversation grows too long, it is compacted. The model only ever sees the current prompt, the current tools and a fresh snapshot of what is open.
An external agent is outside FloMotion's control. The command line hands it the new tool list when it changes. The old tools, old context and old results stay in the agent's history until the agent compacts or clears it. Over a long task the external agent spends more tokens on the same work.
The overall choice depends on existing paid plans. Many providers sell fixed price plans with a large usage allowance. On such a plan the extra tokens cost little, and the flat rate per server action is the only FloMotion charge. On a pay per token plan the extra tokens are billed in full. That can cost more than the credits saved, and the built-in assistant is usually the cheaper option.
Links
- flomotion-desktop on GitHub, source, releases and the agent instructions.
- Claude Code, Codex CLI and Gemini CLI, three agents known to work with it.
- Agent-generated circuit simulation, how the simulation in the example works.
Try it yourself
Open the workspace, describe a part, and see what the agent does with it. No install, no setup. Sign-in is optional for the first run.
Start building