Import STEP files
August 9, 2026
This guide covers bringing an existing STEP file into a FloMotion mechanics workspace: importing it as a part, splitting a multi-body file into separate parts, and reverse-engineering a part into an editable component.
The basic loop
- Import a STEP file. It becomes a part in the workspace component library.
- A multi-body STEP file can be split into separate parts by the agent.
- The agent places the imported components into the assembly and defines joints and actuators.
- The agent can reverse-engineer a part into a script to make it editable. A reverse-engineered part may be a simplified version.
- Continue with joints, physics, and simulation at any stage of the import, like any other part.
An imported part renders and behaves like a generated one. The difference is that it starts as fixed geometry, not a script, until the agent rebuilds it.
Importing a file
In the mechanics workspace, open the parts panel or the File menu and choose Import. Pick a .step or .stp file (up to 32 MB). The file uploads, the server checks it is valid STEP, and the part appears in the component library.
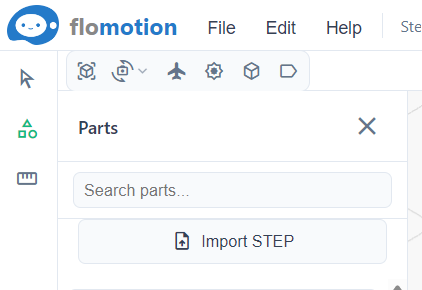
The part can then be placed in the assembly.
A few things happen automatically:
- The part name comes from the file name, cleaned up to a valid id. If that name is taken, a number is appended.
- A bounding box is computed for physics and spatial context. Simulation uses that box for collision until finer shapes are added.
- The part renders from the imported geometry, the same way a generated part renders.
An imported part has no script. The script editor stays hidden for it, and CAM is unavailable, until it is reverse-engineered (see below). Everything else works normally: rename, place, joint, copy the workspace, clone the project.
Splitting a multi-body file
STEP files often carry a whole product tree: subassemblies, named solids, and per-instance positions. A single import lands all of that as one part, which can be used as is. When separate parts are needed, the agent can split it.
If asked, the agent reads the product tree (names, instance counts, bounding boxes) and proposes a split. It can group the tree nodes into new parts and place each one in the assembly using the positions from the file, so the arrangement matches the original.
Example prompts:
Split this import into separate parts by subassembly.
Pull the housing and the shaft out as their own parts and leave the rest.
Nodes that are not mapped are simply not created, so a large file can be brought in partially. For a flat file with many solids and no structure, the agent splits per solid and names the pieces, then regroups them on request.
The split produces new imported parts. The agent decides the hierarchy, so it is worth checking the resulting tree and joints before relying on them.
Reverse-engineering a part
An imported part is fixed geometry. To make it parametric, ask the agent to rebuild it as a script.
Reverse-engineer the housing into an editable script.
The agent inspects the geometry (dimensions, holes, faces) and writes a build123d script that reconstructs the part. The original import is never discarded. The part keeps both versions: the original geometry and the script-generated rebuild.
Because the rebuild is a reconstruction, it can differ from the original. Every rebuild is mesh-diffed against the import automatically, and the difference (volume, bounding box, surface deviation) comes back for the agent to act on. The agent can measure the original again, edit the script, and re-check, rather than converting in one shot.
This step handles clean prismatic parts well in practice. Organic or heavily freeform shapes are harder to reconstruct exactly, so read the comparison and inspect the result before treating the rebuild as a match.
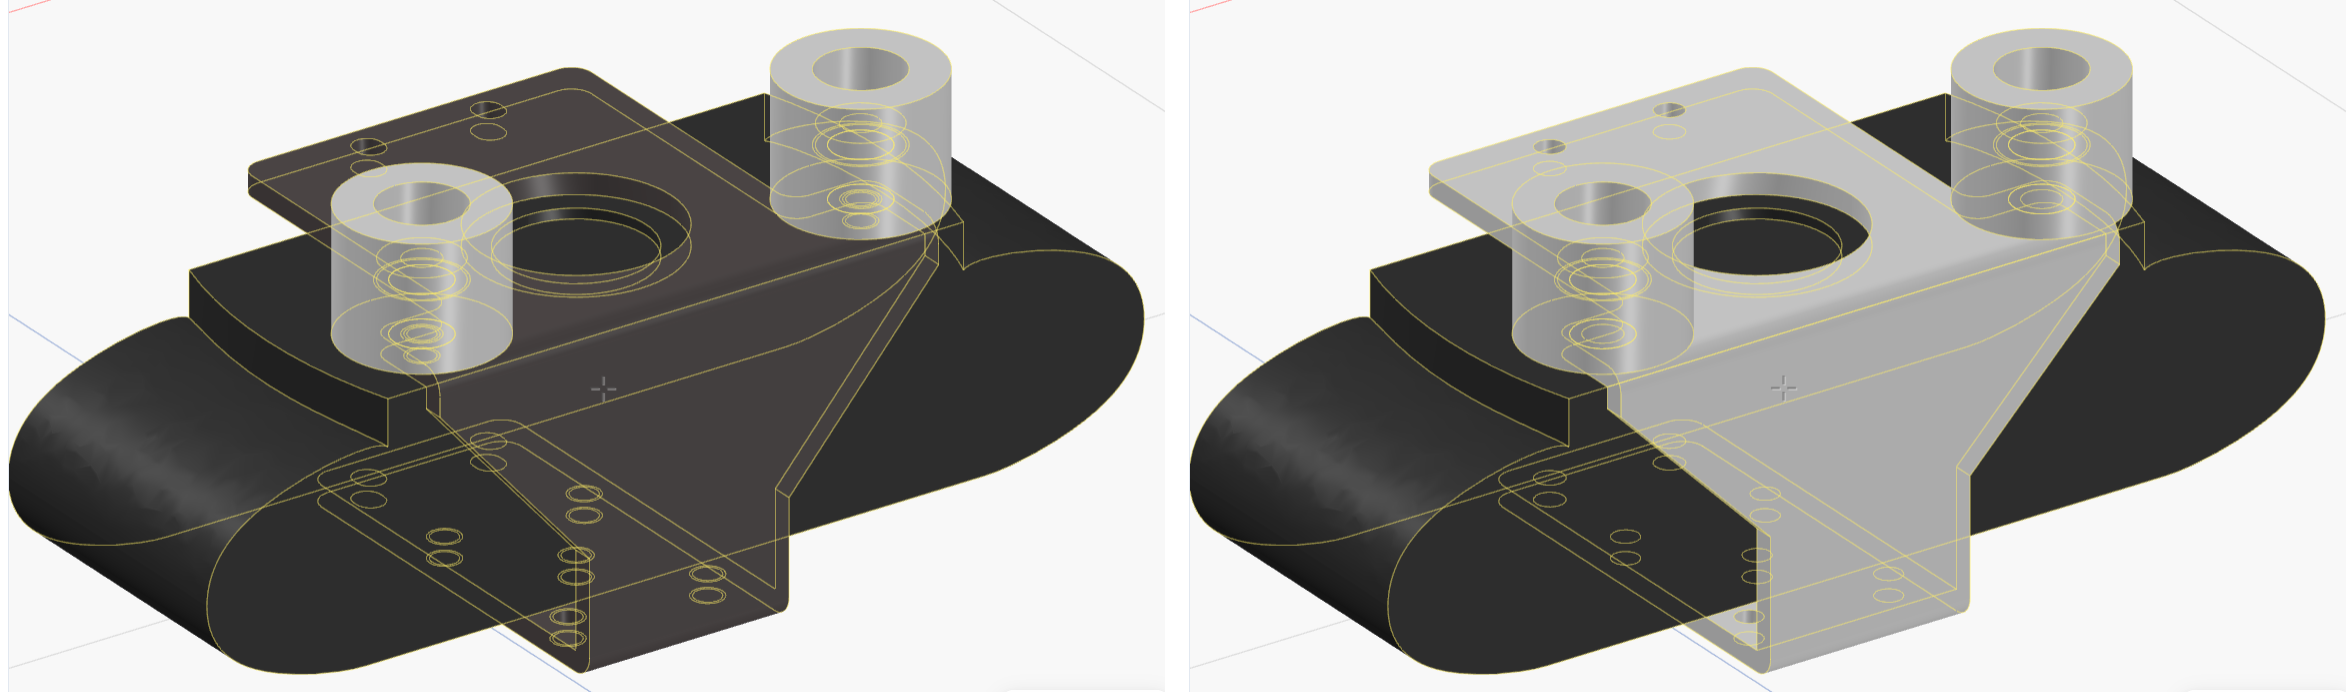
Reconstruction is iterative rather than one-shot, and the effort scales with shape complexity. For the part shown above, a single pass recovered the bulk of the shape, on the order of 70 percent, and about seven follow-up prompts closed the gap to a full match as the agent measured the original, edited the script, and re-checked against the mesh-diff. A more complex shape can take considerably more; a clean prismatic one, considerably less.
Comparing original and rebuild
Once a part has both versions, the assembly tree shows a view control on it:
- Rebuild shows the agent's script result. This is the default once a rebuild exists.
- Original shows the imported geometry.
- Ghost shows the rebuild with the original overlaid as a translucent shell, so any deviation is visible directly in the viewport.
Ghost is the quickest way to judge a reverse-engineered part: where the solid and the shell separate is where the script and the original disagree.
What is editable and what is fixed
An imported part starts as fixed geometry: no script, and CAM unavailable. It still participates in the assembly immediately. Once reverse-engineered, it gains an editable script, CAM applies to the rebuild, and the original geometry is preserved alongside it.
Working with the agent
The agent is fast at reading a STEP tree and proposing a split or a rebuild. That speed comes with the usual caveats.
- Check the split. The hierarchy and joints are the agent's choice. Confirm the tree matches the intended structure.
- Read the comparison. A rebuild can drift from the original. The mesh-diff and the ghost view exist to catch that. Use them before depending on a rebuilt part.
- Expect fixed geometry until rebuilt. An imported part cannot be parametrically edited until a script exists. Ask for a reverse-engineer pass first.
Treat an import as a fast way in, and a rebuild as a draft to review, not a guaranteed reproduction.
Getting started
- Open a mechanics workspace.
- Import a
.stepor.stpfile from the parts panel or File menu. - Place it, or ask the agent to split it into parts.
- Ask the agent to reverse-engineer a part when an editable version is needed.
Try it yourself
Open the workspace, describe a part, and see what the agent does with it. No install, no setup. Sign-in is optional for the first run.
Start building